
Building Warlord Game’s Modular Terrain
 Medium Density Fiberboard (MDF) has taken over the wargames terrain market. Every new miniature game release seems to get a companion set of MDF scenery to go with it. The Roman Coliseum, a Wells Fargo Bank and stagecoach, or Japanese temples are all available as laser cut MDF flatpacks. While I welcome the variety, MDF has serious drawbacks: kits are still overly expensive for what you get, MDF itself is bad news if particles become airborne, and it takes a lot of work to make perfectly smooth MDF look anything remotely like a textured brick or natural wood surface. However, I did pick up Warlord’s Modular Terrain Boards during their Christmas sale and found to my surprise that, for area terrain, MDF is the perfect medium to work with.
What’s in the Box?
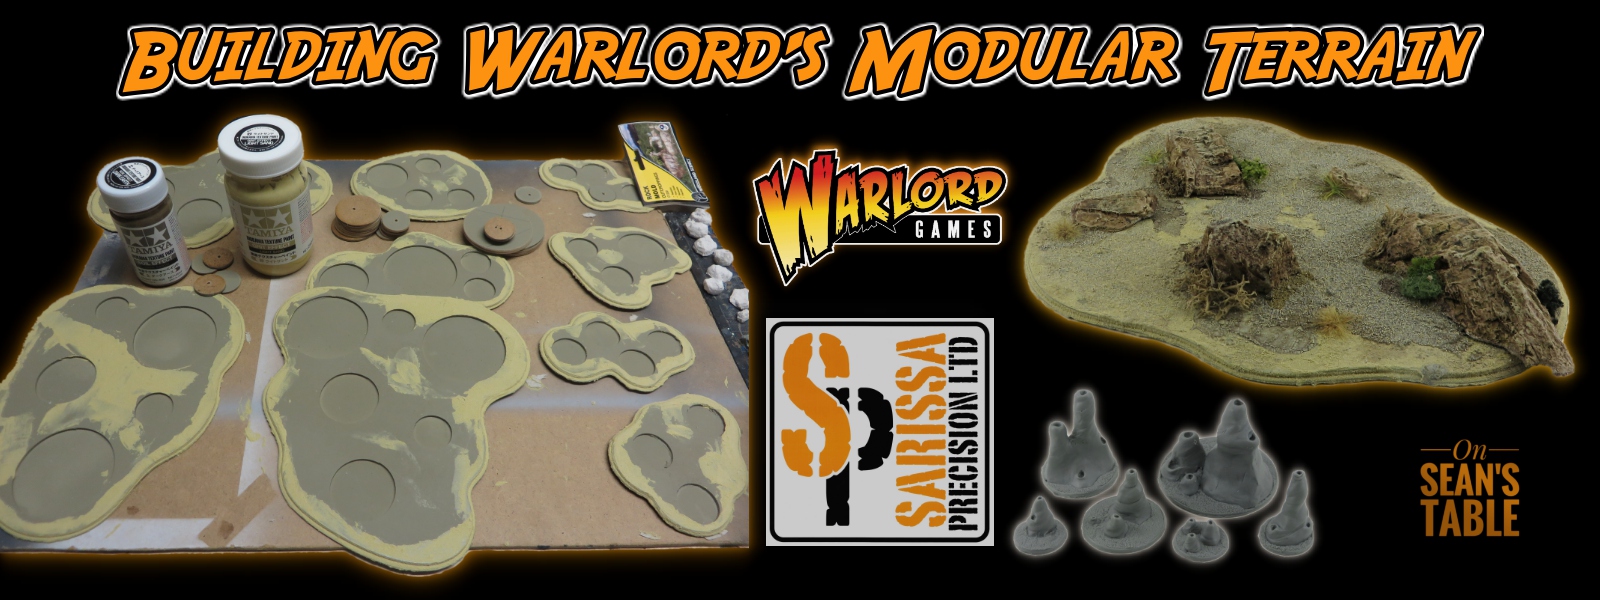
You get an awful lot of surface area in one lightweight flat pack. Lower shipping costs are certainly an advantage of MDF compared to resin. Inside are three sheets of laser cut MDF along with corresponding cardboard cutouts for backing. There are numerous removable circles – 25, 40, and 60 mm each – so you can swap them out for other features like trees, grass tufts, or puddles or just move them out of the way to make room for models to move through.


The templates can represent terrain such as forest, an oasis, or a rock field which has a defined set of characteristics. Area terrain like this is a key part of making tabletop battlefields playable for wargamers. This set comes with resin cast rocks and termite mounds to help depict the type of terrain you’re playing over. Templates with rocks, for example, might be impassable to tanks or horses and give cover to infantry while the termite mounds might block line of sight and provide cover. As long as gamers define the effects of terrain before the game starts its adds a lot of versatility to your gaming surface.


Getting the Most Out of MDF
Every terrain medium has its idiosyncrasies. If you’re not careful the MDF and cardboard in this kit will warp and really detract from the overall appearance.

A couple of dabs of superglue and a good dose of spray adhesive on the back of the MDF pieces glued the cardboard backings in place. MDF is somewhat less absorbent than cardboard so it makes sense to do it this way. Also, you avoid getting sticky stuff in the holes where it will be a nuisance down the road. Finally, I built of several mist coats of spray paint. Eventually, the MDF and cardboard will stop drinking it in and you can do a heavier top coat. This way I know for sure that I won’t soak the cardboard and have it warp. Now I could go ahead and add any amount of paint or glue as the surface was sealed and mostly impermeable.


Rock Solid
The kit came with eight resin rocks which was nowhere near what I’d need to do the job properly. Cork chips, stones from the garden, or carved styrofoam are all cheap and easy ways to do rocks. Once again I turned to model railway supplies to get a more realistic appearance. I had some Woodland Scenics molds and plaster already. Rocks made this way look more realistic, are light, and can take a beating and still look good. It is also a snap to use washes to stain the plaster. A top trick is to tint your white plaster while mixing it with cheap craft paint so the plaster rocks are coloured all the way through. This way if they chip or break later you aren’t left with a stark white spot. If you’re going to do a lot of plaster casting get some cheap brown ink to tint large batches with only a few drops to avoid undermining the set of the plaster.


The Trial and Errors of MDF
I wish I could tell you the rest of this project when exactly as planned. It didn’t! I’m happy with the end result but getting there was trial and mostly error. Hopefully you can learn from my mistakes. Here’s what went wrong and solutions that worked, or I think will work for next time.
The round inserts, after priming, fit so snugly in their holes they barely came out again! The tolerances on laser cut MDF are so small that even a moderate coat of spray paint is enough to fill the gap. I ended up putting a screw through the bases (in batches) and spun the bases on my drill and used a piece of sandpaper to evenly remove material from the base edges. This was time-consuming and although I used a mask and a strong vent fan, sanding MDF is never a good idea due to the chemicals in it, the tiny size of the dust it creates, and the fact that once in your lungs it stays there. Next time I’ll remove a little material from the inside of each of the receiving holes. Less dust, less work, same result.
Basing material such as sand and grit narrows the holes and adds to base width so they won’t fit together. Sigh… The point of modular terrain is to be able to remove the round bases from the larger templates so you can swap terrain around or move it out of the way to make room for models. I just gave in and glued the bases into the templates as, without starting from scratch, I couldn’t see a way to rescue the operation. The upside is, when finished, the bases look very uniform without a bunch of circles to break up the overall look of the piece. Also, I realized removing rocks from the bases was not necessary as infantry still fit easily and the area was impassable to vehicles anyway. Below you’ll see a few wasted steps and then a few snaps of texturing the whole piece, circles and all, with Tamiya texture medium, cheap craft paints, sand, and Games Workshop Agrellan Earth for cracked earth detail in spots.
The silver lining here is that I got to play with Tamiya Diorama Texture paints which were a lot of fun to work with. Luckily, everything worked out fine in the end.


Of course, the whole purpose of making terrain is to play games with it! Here are a few pictures of the templates in a test game of Gaslands that Seth Wilson ran for me the other day.


I bought two sets of the modular terrain boards. In a future post I’ll use the second set to make palm grove and oasis area terrain, learning from my mistakes and (hopefully!) doing it better.

